Group assignments are ideal if you would like multiple students to jointly share ownership of the same journal.
https://www.youtube.com/watch?v=v-DxRlPNz8U
¶ Creating a group assignment
You can access the group assignment settings in the assignment editor under the
'Details' section in the 'Settings' menu, or during the assignment creation wizard.
Changing the assignment type (e.g. from group to individual) will no longer be available if the assignment already contains one or more individual journals.

¶ Settings
Enabling the Group assignment setting unlocks various other related settings:
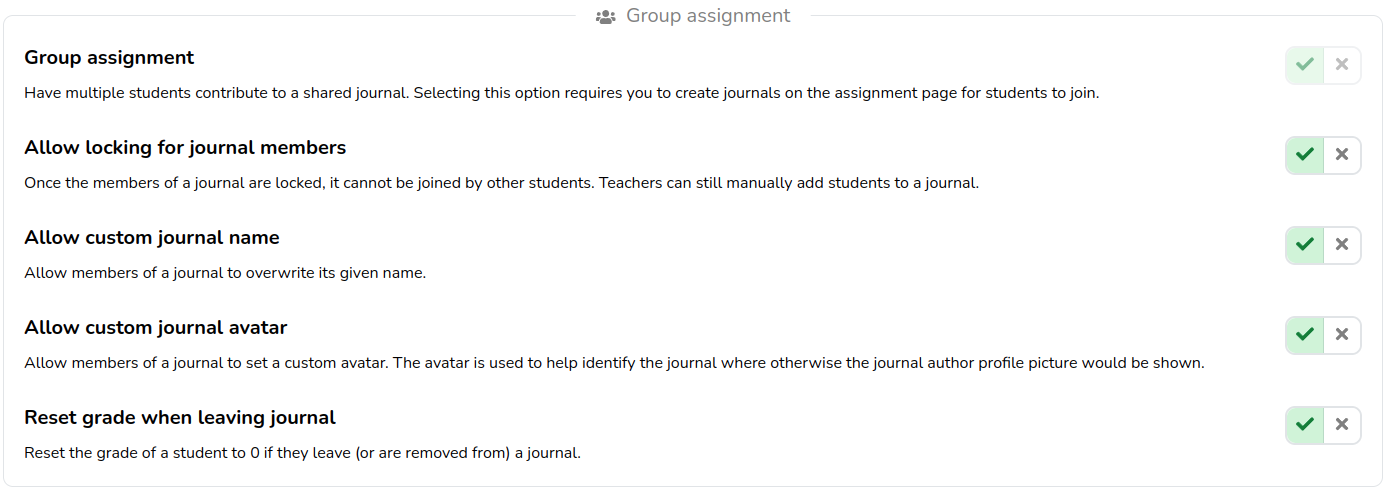
¶ Group assignment
Have multiple students contribute to a shared journal. Selecting this option requires you to create journals on the assignment page for students to join.
¶ Allow locking for journal members
Once the members of a journal are locked, it cannot be joined by other students. Teachers can still manually add students to a journal.
¶ Allow custom journal name
Allow members of a journal to override its given name.
¶ Allow custom display picture
Allow members of a journal to override its display picture.
¶ Reset grade when leaving journal
Reset the grade of a student to 0 if they leave (or are removed from) a journal.
When creating a group assignment for the first time, the next step is to create one or more group journals.
¶ Creating one or more group journals
You can access the journal creation menu on the journal overview page via the 'Create New Journals' button. This button is also always accessible via the 'Actions' menu.

¶ Manually create group journals
If you would rather import collaboration groups from a spreadsheet follow these steps.
Clicking on the 'Create New Journals' button opens up the journal creation menu:
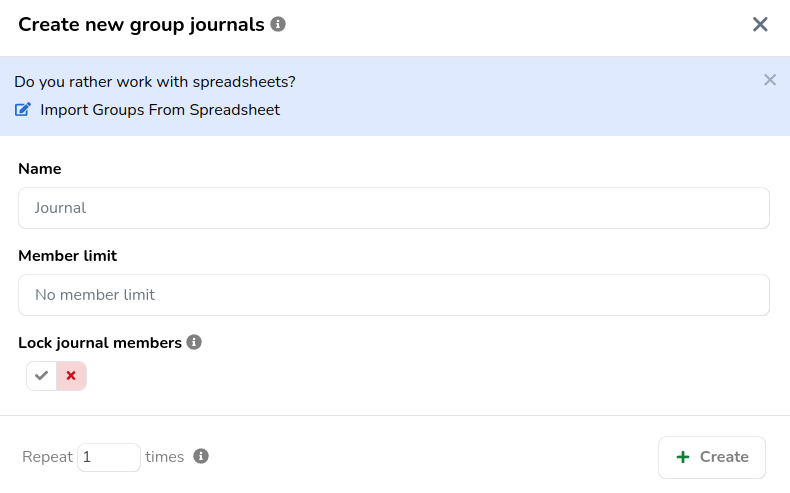
- Name: Determines the display name of the journal. It is possible to let students set this name themselves later on via the allow custom journal name setting.
- Member limit: Determines how many students can be part of the same journal.
- Lock journal members: Determines if students can leave or join the journal themselves.
- Repeat X times: Determines how many journals you will create.
When you are done, click the 'Create' button to create one or more journals.
¶ Create group journals with the help of a spreadsheet
If you would rather use a spreadsheet to create group journals, click the 'Import groups from spreadsheet' banner at the top of the wizard. This will open the following menu:
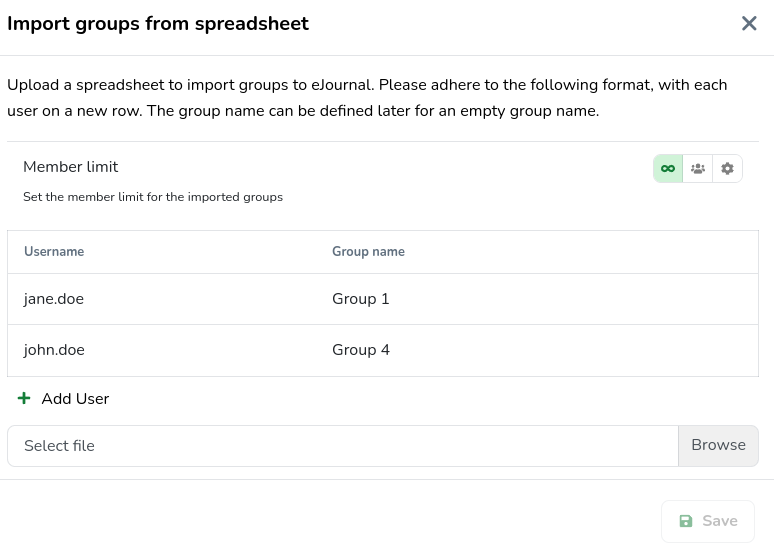
Follow the instructions and do not forget to save when you are finished.
Students can join group journals themselves
After you have created one or more journals, students who are not yet part of a journal are presented with a join a journal view. Here they can see the existing journals, their members, and join a journal based on their preferences.
¶ Managing group journals
You can manage any group journals you have created via the journal overview page or from the view of a specific journal itself.
¶ Making changes to individual journals
¶ Managing journal members
From the journal overview, clicking 'View members' on a specific journal allows you to see (and manage) the members of that journal.
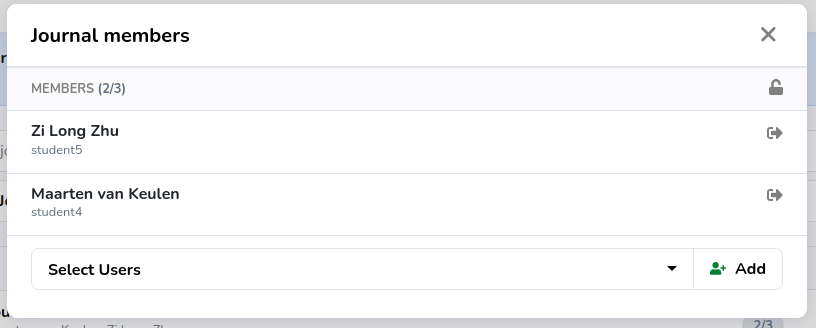
- Select Users: Add one or more users to the group journal.
- : Lock or unlock the journal, allowing students to leave or join that journal at will.
- : Remove that specific user from the group journal.
From the view of a specific journal, navigating to the journal overview shows you its members.

Here you can add or remove members, as well as lock the configration via the icon.
¶ Managing journal details
Via the journal settings menu you can configure the settings such as the journal name, avatar or even delete the journal entirely.
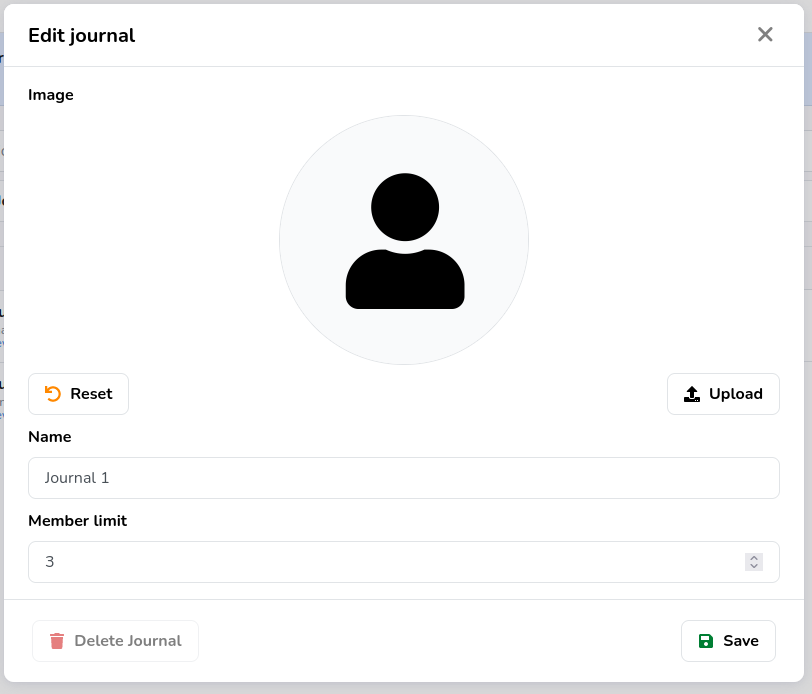
You can access the manage journal settings of a specific journal via the '...' menu and clicking 'Edit'.

You can access the manage journal settings of a specific journal via the '...' menu and clicking 'Journal Settings'.

¶ Making changes to multiple journals at the same time
Navigating to each individual group journal to make changes can be tedious, for this scenario we offer the ability to make changes to group journals in bulk. You will find this menu via the 'Manage Group Journals' button under the journal overview page 'Actions'.

This will open the following menu:
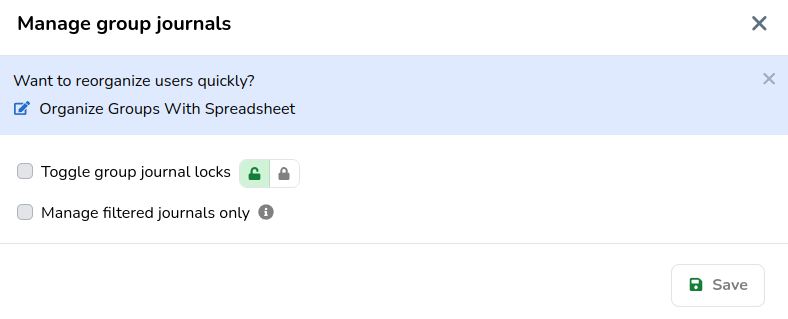
From here you can change the journal lock state or group composition for multiple journals in one action. If you would like to apply your changes to a specific selection of journals, make sure to tick the 'Manage filtered journals only' setting.
The functionality to delete a journal is only available when that journal has no members.
Part of this functionality outlined above is also available to the students part of the group journal. What functionality is available depends on the settings that you configured.