- Assignment settings
- Free form evidence collection
- Creating entry templates
- Configuring activities
- Managing entry categories
- Collaboration
In this guide, we break down all the parts of the assignment editor. You can navigate here via the actions menu on the right hand side of the assignment page.

In-app tutorial
Did you know the assignment editor also contains a tutorial? Click the icon at the top of the page to start the tutorial.

¶ Configuration options
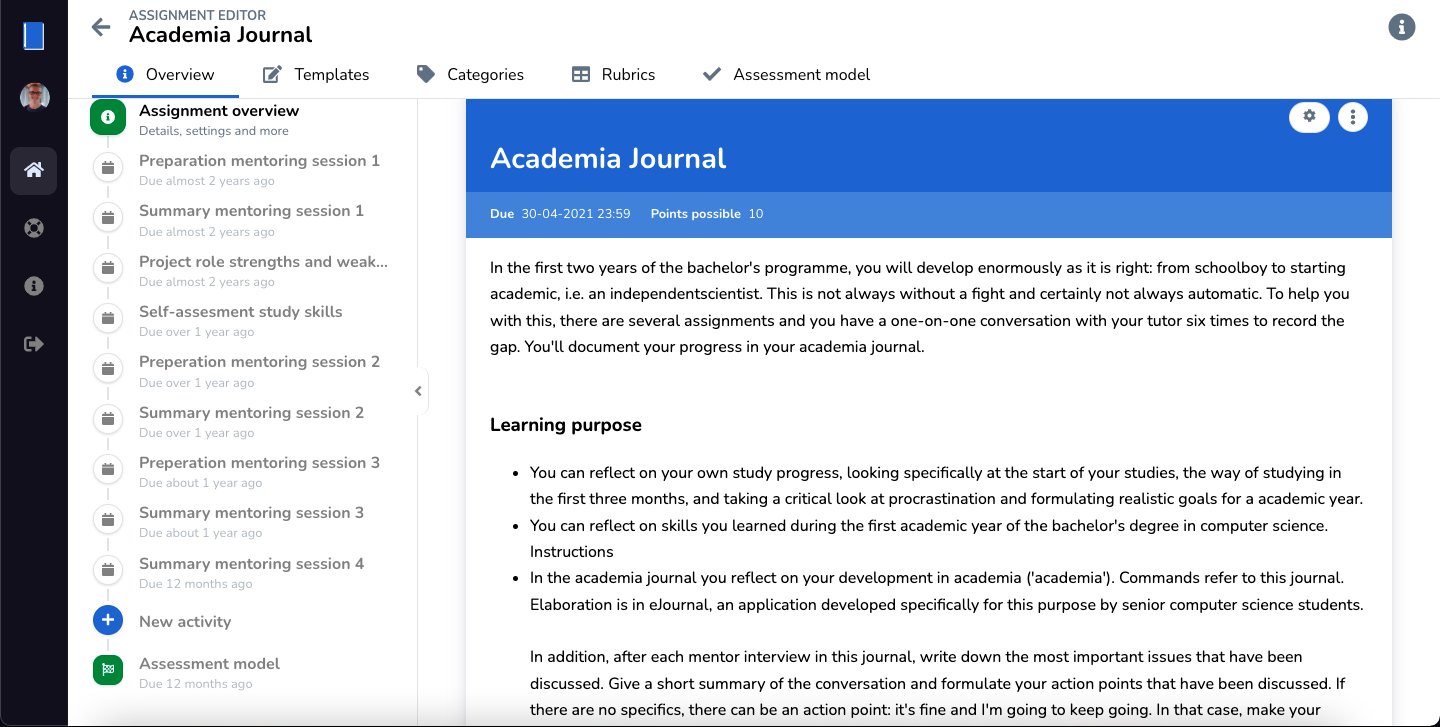
The left side of the assignment editor contains the timeline which defines the overal structure of the journals. It is possible to add new activities to the timeline via the + button or to view or edit existing activities by clicking on them.
The right side of the screen contains the other configuration options. These include the assessment model, templates, and categories. Read more about how to configure each option in their own sections:
- Group assignments
- Create templates
- Configuring activities
- Create categories
- Select and use an assessment model
Re-using existing assignments
Do you wish to re-use an existing assignment configuration? It is possible to copy an existing configuration. This also allows you to move all deadlines by for example 1 year.
¶ Making changes
If you click on an already created item (intermediate deadlines, templates, etc..), it will open a preview of that item in the middle on the screen. On the top-right you see the buttons 'Delete' and 'Edit' to delete or edit the selected item.
When you click 'Edit', the middle of the screen will change from preview to edit mode. In this mode you can make changes to the item. The changes are not automatically saved. To save them, click 'Save' in the bottom right. If you want to revert back the the saved state, you can also click 'Cancel' in the top right. After saving or editing, you will be returned back to the preview screen.
¶ Keep track of your pending changes
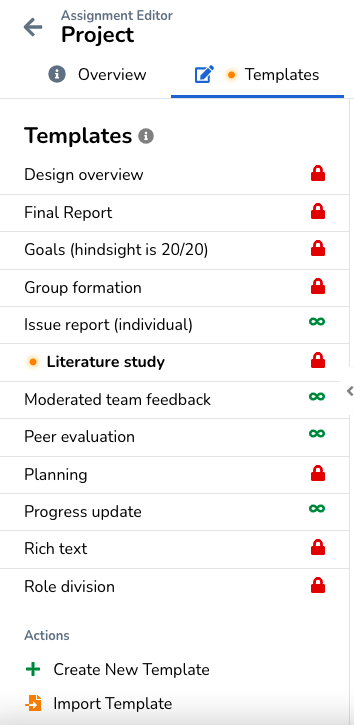
When editing items in the assignment editor, orange cirlces will appear on items that have pending changes. The screenshot below shows a teacher that has edited, but not yet saved the 'Interview' template. This circle is to easily navigate you back to the items you are working on. It will also warn you when trying to close the assignment editor with pending changes.
